Multi-Server MCP Langgraph Agent
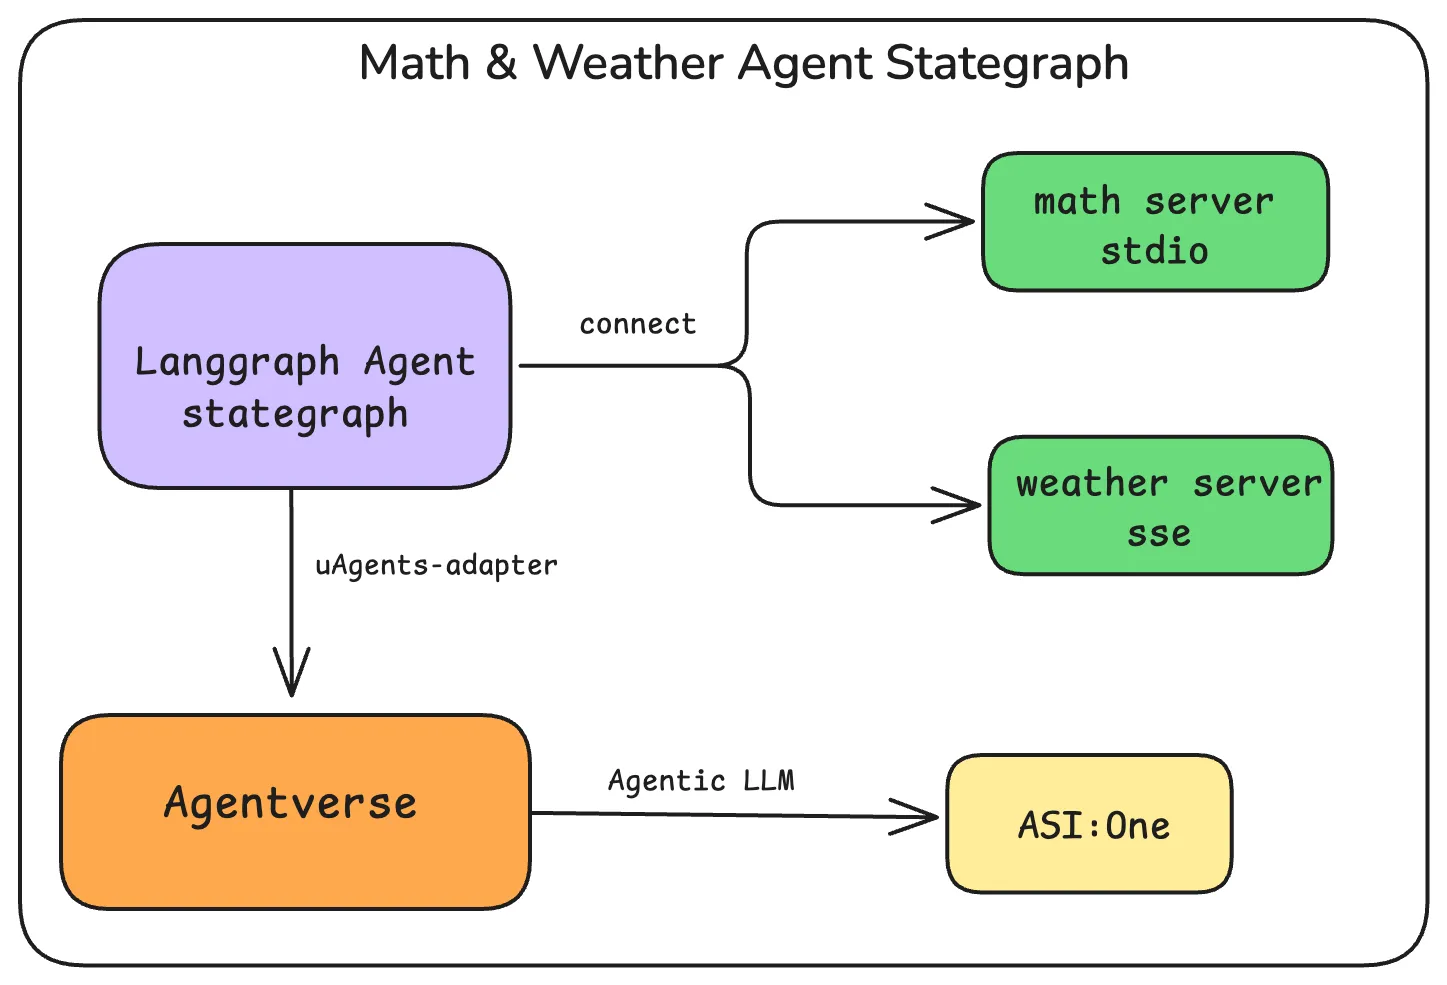
This guide demonstrates two approaches for building LangGraph agents that connect to multiple MCP servers, then wrap them as uAgents and register them on Agentverse for discovery and use by ASI:One LLM.
Overview
Both examples in this guide:
- Connect to multiple MCP servers (math and weather) using
langchain_mcp_adapters.MultiServerMCPClient - Support multiple transport methods (stdio and SSE) for different MCP servers
- Wrap the LangGraph agent using
uagents_adapterto become a uAgent - Register the uAgent on Agentverse, making it discoverable and callable by ASI:One
The key difference is in the agent architecture:
- Basic Multi-Server Agent: Uses a simple LangGraph agent with ReAct framework
- Advanced State Graph Agent: Uses a LangGraph state graph for more complex workflows and state management
Transport Methods
In both examples, we use two different transport methods for the MCP servers:
-
stdio Transport (Math Server):
- Used for local MCP servers that run as subprocesses
- Communication happens through standard input/output
- Good for local development and testing
- Example:
mcp.run(transport="stdio")
-
SSE Transport (Weather Server):
- Server-Sent Events (SSE) for real-time communication
- Used for remote or web-based MCP servers
- Supports long-lived connections
- Example:
mcp.run(transport="sse", port=8000)
The MultiServerMCPClient handles both transport types seamlessly, allowing you to mix and match different transport methods based on your needs.
Common Server Setup
Both examples use the same MCP servers. Let's set those up first:
1. Create the Math MCP Server
from mcp.server.fastmcp import FastMCP

mcp = FastMCP("Math")

@mcp.tool()
def add(a: int, b: int) -> int:
    """Add two numbers"""
    return a + b

@mcp.tool()
def multiply(a: int, b: int) -> int:
    """Multiply two numbers"""
    return a * b

if __name__ == "__main__":
    mcp.run(transport="stdio")
2. Create the Weather MCP Server
from mcp.server.fastmcp import FastMCP

mcp = FastMCP("Weather")

@mcp.tool()
def get_weather(city: str) -> str:
    """Get the current weather for a city"""
    # This is a mock implementation
    return f"The weather in {city} is sunny and 25°C"

if __name__ == "__main__":
    mcp.run(transport="sse", port=8000)
Approach 1: Basic Multi-Server Agent
This approach uses LangGraph's create_react_agent to create a simple agent that can access tools from multiple MCP servers.

Create and Register the Basic Multi-Server Agent
import os
import time
from dotenv import load_dotenv

from langchain_openai import ChatOpenAI
from langchain_core.messages import HumanMessage
from langchain_mcp_adapters.client import MultiServerMCPClient
from langgraph.prebuilt import create_react_agent

from uagents_adapter import LangchainRegisterTool, cleanup_uagent
from uagents_adapter.langchain import AgentManager

# Load environment variables
load_dotenv()

# Set your API keys
OPENAI_API_KEY = os.getenv("OPENAI_API_KEY")
API_TOKEN = os.getenv("AGENTVERSE_API_KEY")

# Initialize the model
model = ChatOpenAI(model="gpt-4o")

# Store the agent globally so it can be accessed by the wrapper function
agent = None

async def setup_multi_server_agent():
    global agent

    print("Setting up multi-server agent...")
    async with MultiServerMCPClient(
        {
            "math": {
                "command": "python",
                "args": ["math_server.py"],
                "transport": "stdio",
            },
            "weather": {
                "url": "http://localhost:8000/sse",
                "transport": "sse",
            }
        }
    ) as client:
        tools = client.get_tools()
        agent = create_react_agent(model, tools)

        # Test the agent with both services
        print("Testing math capabilities...")
        math_response = await agent.ainvoke({
            "messages": [HumanMessage(content="what's (3 + 5) x 12?")]
        })
        print(f"Math test response: {math_response['messages'][-1].content}")

        print("Testing weather capabilities...")
        weather_response = await agent.ainvoke({
            "messages": [HumanMessage(content="what's the weather in NYC?")]
        })
        print(f"Weather test response: {weather_response['messages'][-1].content}")

        # Keep the connection alive
        while True:
            await asyncio.sleep(1)

def main():
    # Initialize agent manager
    manager = AgentManager()

    # Create agent wrapper
    async def agent_func(x):
        response = await agent.ainvoke({"messages": [HumanMessage(content=x)]})
        return response["messages"][-1].content

    agent_wrapper = manager.create_agent_wrapper(agent_func)

    # Start the agent in background
    manager.start_agent(setup_multi_server_agent)

    # Register with uAgents
    print("Registering multi-server agent...")
    tool = LangchainRegisterTool()
    agent_info = tool.invoke(
        {
            "agent_obj": agent_wrapper,
            "name": "multi_server_agent_math_langchain_mcp",
            "port": 8080,
            "description": "A multi-service agent that can handle math calculations and weather queries",
            "api_token": API_TOKEN,
            "mailbox": True
        }
    )

    print(f"✅ Registered multi-server agent: {agent_info}")

    try:
        manager.run_forever()
    except KeyboardInterrupt:
        print("🛑 Shutting down...")
        cleanup_uagent("multi_server_agent")
        print("✅ Agent stopped.")

if __name__ == "__main__":
    import asyncio
    main()
Approach 2: Advanced State Graph Agent
This approach uses LangGraph's StateGraph to create a more sophisticated agent with explicit state management and conditional workflow branching.
Create and Register the Multi-Server Graph Agent
import os
import time
import asyncio
from dotenv import load_dotenv

from langchain_openai import ChatOpenAI
from langchain_core.messages import HumanMessage
from langchain_mcp_adapters.client import MultiServerMCPClient
from langgraph.graph import StateGraph, MessagesState, START
from langgraph.prebuilt import ToolNode, tools_condition

from uagents_adapter import LangchainRegisterTool, cleanup_uagent
from uagents_adapter.langchain import AgentManager

# Load environment variables
load_dotenv()

# Set your API keys
OPENAI_API_KEY = os.getenv("OPENAI_API_KEY")
API_TOKEN = os.getenv("AGENTVERSE_API_KEY")

# Initialize the model
model = ChatOpenAI(model="gpt-4o")


# Store the graph globally so it can be accessed by the wrapper function
_global_graph = None
# Add an event to signal when the graph is ready
graph_ready = asyncio.Event()

async def setup_multi_server_graph_agent():
    global _global_graph

    print("Setting up multi-server graph agent...")
    try:
        # Create the client without async with
        client = MultiServerMCPClient(
            {
                "math": {
                    "command": "python",
                    "args": ["./math_server.py"],
                    "transport": "stdio",
                },
                "weather": {
                    "url": "http://localhost:8000/sse",
                    "transport": "sse",
                }
            }
        )

        # Get tools directly
        tools = await client.get_tools()
        print(f"Successfully loaded {len(tools)} tools")

        # Define call_model function
        def call_model(state: MessagesState):
            response = model.bind_tools(tools).invoke(state["messages"])
            return {"messages": response}

        # Build the graph
        builder = StateGraph(MessagesState)
        builder.add_node(call_model)
        builder.add_node(ToolNode(tools))
        builder.add_edge(START, "call_model")
        builder.add_conditional_edges(
            "call_model",
            tools_condition,
        )
        builder.add_edge("tools", "call_model")
        _global_graph = builder.compile()
        print("Graph successfully compiled")

        # Test the graph
        try:
            print("Testing math capabilities...")
            math_response = await _global_graph.ainvoke({"messages": "what's (3 + 5) x 12?"})
            print(f"Math test response: {math_response['messages'][-1].content}")

            print("Testing weather capabilities...")
            weather_response = await _global_graph.ainvoke({"messages": "what's the weather in NYC?"})
            print(f"Weather test response: {weather_response['messages'][-1].content}")
        except Exception as e:
            print(f"Error during testing: {e}")

        # Signal that the graph is ready
        graph_ready.set()

        # Keep the connection alive
        while True:
            await asyncio.sleep(1)
    except Exception as e:
        print(f"Error setting up graph: {e}")
        # Set the event even in case of error to avoid deadlock
        graph_ready.set()

def main():
    print("Initializing agent...")
    # Initialize agent manager
    manager = AgentManager()

    # Create graph wrapper with proper error handling
    async def graph_func(x):
        # Wait for the graph to be ready before trying to use it
        await graph_ready.wait()

        if _global_graph is None:
            error_msg = "Error: Graph not initialized properly. Please try again later."
            print(f"Response: {error_msg}")
            return error_msg

        try:
            # Print the incoming message
            print(f"\nReceived query: {x}")

            # Process the message
            if isinstance(x, str):
                response = await _global_graph.ainvoke({"messages": x})
            else:
                response = await _global_graph.ainvoke({"messages": x})

            # Extract and print the response
            result = response["messages"][-1].content
            print(f"\n✅ Response: {result}\n")
            return result
        except Exception as e:
            error_msg = f"Error processing request: {str(e)}"
            print(f"\n❌ {error_msg}\n")
            return error_msg

    agent_wrapper = manager.create_agent_wrapper(graph_func)

    # Start the graph in background
    manager.start_agent(setup_multi_server_graph_agent)

    # Register with uAgents
    print("Registering multi-server graph agent...")
    tool = LangchainRegisterTool()
    try:
        agent_info = tool.invoke(
            {
                "agent_obj": agent_wrapper,
                "name": "multi_server_graph_agent_math_langchain_mcp",
                "port": 8080,
                "description": "A multi-service graph agent that can handle math calculations and weather queries",
                "api_token": API_TOKEN,
                "mailbox": True
            }
        )
        print(f"✅ Registered multi-server graph agent: {agent_info}")
    except Exception as e:
        print(f"⚠️ Error registering agent: {e}")
        print("Continuing with local agent only...")
    try:
        manager.run_forever()
    except KeyboardInterrupt:
        print("🛑 Shutting down...")
        cleanup_uagent("multi_server_graph_agent")

        print("✅ Agent stopped.")

if __name__ == "__main__":
    import asyncio
    main()
Key Differences Between the Two Approaches
-
Architecture:
- Basic Agent: Uses LangGraph's
create_react_agentfor a simple ReAct-style agent. - Graph Agent: Uses LangGraph's
StateGraphfor explicit state management and workflow control.
- Basic Agent: Uses LangGraph's
-
Control Flow:
- Basic Agent: The control flow is managed internally by the ReAct framework.
- Graph Agent: The control flow is explicitly defined with nodes, edges, and conditional branching.
-
State Management:
- Basic Agent: State is managed implicitly within the ReAct agent.
- Graph Agent: State is explicitly managed and can be more easily inspected and modified.
-
Extensibility:
- Basic Agent: Simpler to set up but less flexible for complex workflows.
- Graph Agent: More complex setup but offers greater flexibility for sophisticated agent behaviors.
Getting Started
-
Get your Agentverse API Key:
- Follow the Agentverse API Key guide to obtain your API key
- Make sure to save your API key securely as it cannot be regenerated
-
Set up environment variables in a
.envfile:OPENAI_API_KEY=your_openai_api_key
AGENTVERSE_API_KEY=your_agentverse_api_key -
Install dependencies:
pip install langchain-openai mcp langchain-mcp-adapters uagents-adapter python-dotenv -
Create the files:
- Save the math server code as
math_server.py - Save the weather server code as
weather_server.py - Save the basic agent code as
basic_agent.py - Save the graph agent code as
graph_agent.py
- Save the math server code as
-
Start the servers and agents:
# Terminal 1: Start the weather server
python weather_server.py

# Terminal 2: Start the basic agent
python basic_agent.py

# OR to run the graph agent instead
python graph_agent.py -
Test your agent by querying it from Agentverse chat UI.
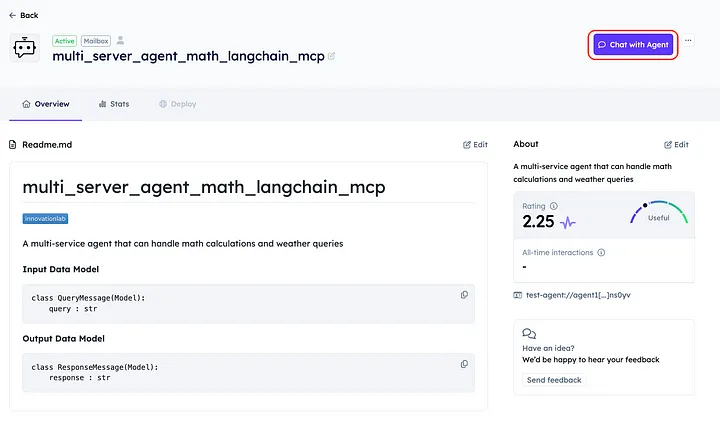
- Open your Agentverse account and goto local agents.
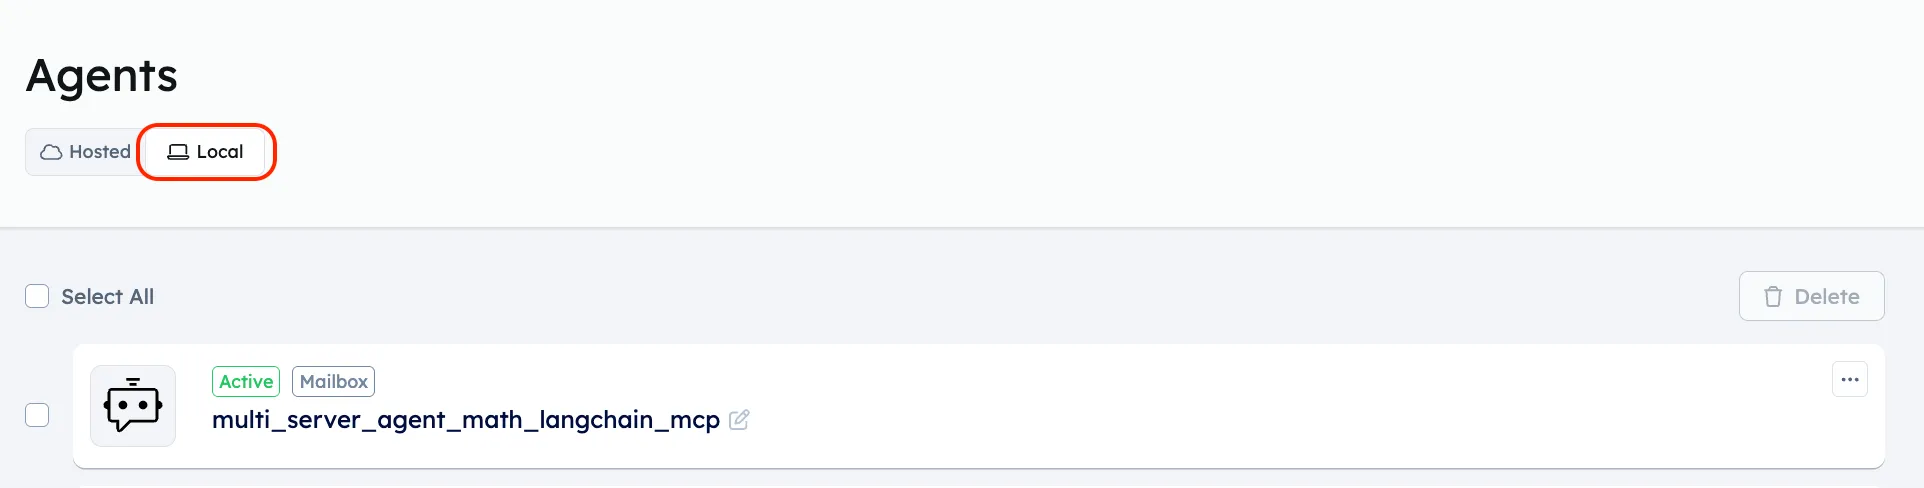
- Click on your agent and Use the "Chat with Agent" button on your Agentverse agent page

When to Use Each Approach
-
Use the Basic Agent when:
- You need a simple agent that can access multiple tools
- You want a quick setup with minimal boilerplate
- The agent's decision-making process is relatively straightforward
-
Use the Graph Agent when:
- You need more control over the agent's workflow
- You want explicit state management
- You need complex conditional branching in your agent's behavior
- You're building an agent with multiple specialized steps or phases
Note: These examples demonstrate how to connect to multiple MCP servers using different transport methods and agent architectures. You can extend these patterns to include any number of MCP servers with different capabilities and create more sophisticated agent behaviors.