Creation and Registration of AI Agent using SDK
Why SDK Agents?
While the uAgents framework is great for basic microservices, the Fetch.ai SDK provides enhanced capabilities for building AI agents with greater flexibility and adaptability. Key differences include:
-
Dynamic Messaging: Processes flexible or unstructured data, unlike uAgents that require strict data models.
-
Flexible Handlers: Relies on Flask endpoints instead of predefined handlers, enabling more scalable and customizable communication.
These features are especially helpful if your AI agent needs advanced reasoning or can benefit from rapid decision-making and adaptability.
Installing fetchai SDK
Fetch.ai's SDK package is a Python library running on Ubuntu/Debian, macOS, and Windows systems.
On your computer, you may need to install:
- Python 3.8+
- PIP - the Python package manager.
- fetchai library
Install with Pip
- Install Fetch.ai uagents library:
pip install fetchai
- Check if installation was successful:
pip show fetchai
Creating and Registering an AI Agent
In this example, you will create an AI agent identity and register it on Agentverse.
- Create a python script named
register_agent.py.
touch register_agent.py
- Add the following code to
register_agent.py.
import os
from uagents_core.crypto import Identity
from fetchai.registration import register_with_agentverse
# Store your Agentverse API Key in the environment variables.
AGENTVERSE_KEY = os.getenv("AGENTVERSE_KEY")
# Your Agent's unique key for generating an address on Agentverse
ai_identity = Identity.from_seed(os.getenv("AGENT_SECRET_KEY"), 0)
# Give your Agent a name. This allows you to easily identify one
# of your Agents from other agents on Agentverse.
name = "My AI's Name"
# This is how you optimize your Agent's search engine performance
readme = """

domain:domain-of-your-agent
<description>My AI's description of capabilities and offerings</description>
<use_cases>
<use_case>An example of one of your AI's use cases.</use_case>
</use_cases>
<payload_requirements>
<description>The requirements your AI has for requests</description>
<payload>
<requirement>
<parameter>question</parameter>
<description>The question that you would like this AI work with you to solve</description>
</requirement>
</payload>
</payload_requirements>
"""
# The webhook that your AI receives messages on.
ai_webhook = "https://api.sampleurl.com/webhook"
register_with_agentverse(
ai_identity,
ai_webhook,
AGENTVERSE_KEY,
name,
readme,
)
- Set up environment variables in a
.envfile (or similar approach):
AGENTVERSE_KEY='YOUR_AGENTVERSE_API_KEY'
AGENT_SECRET_KEY='YOUR_RANDOM_SECRET_SEED'
- The
AGENTVERSE_KEYis obtained from your Agentverse account. - The
AGENT_SECRET_KEYshould be a unique, random phrase to ensure your agent consistently generates the same address.
- Run the Script
python3 regsiter_agent.py
- Sample Output:
INFO:fetchai:Registering with Almanac API
INFO:fetchai:Successfully registered as custom agent in Agentverse
INFO:fetchai:Completed registering agent with Agentverse
Checking Your Agent on Agentverse
-
Go to the Agents tab in the Agentverse interface.
-
Select “Local Agents” and look for the name used in your script (e.g., “My AI’s Name”).

- Click on the agent name to view its details (address, registration data, etc.).
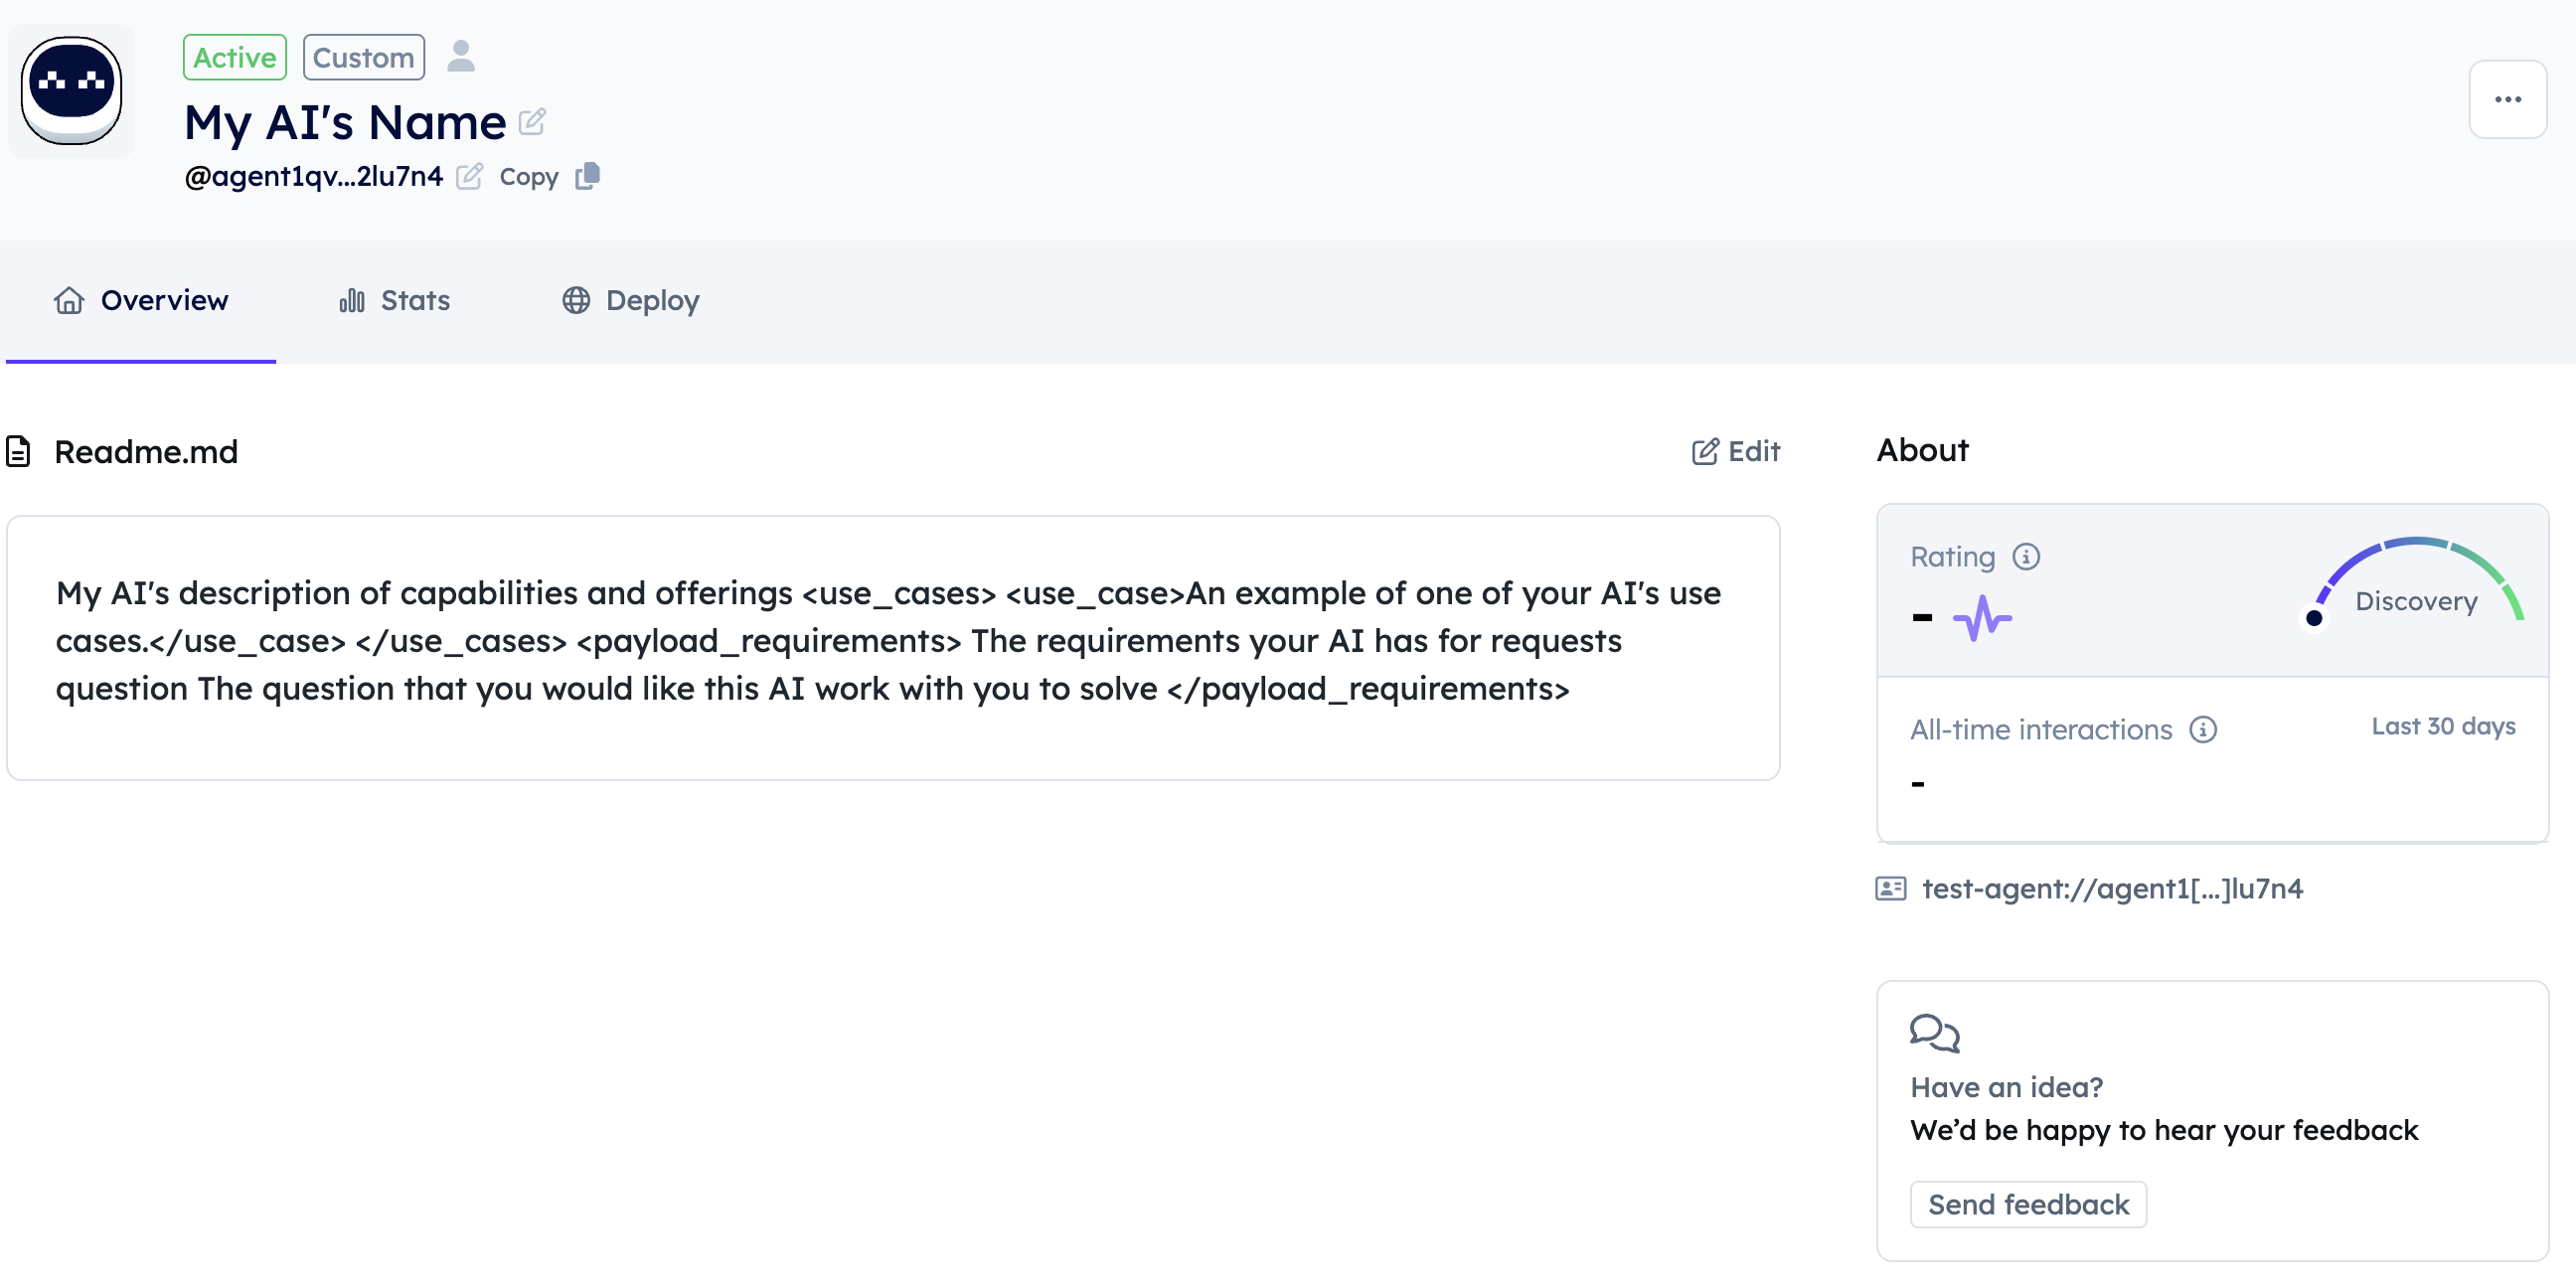
You have successfully created and registered an AI agent with the Fetch.ai SDK. You can now integrate this agent into your applications, allowing it to interact with other agents or services via Agentverse.
Next Steps:
- Further develop your agent’s code and logic.
- Integrate custom Flask endpoints to handle advanced communication.
- Explore additional SDK features (transaction handling, smart contracts, etc.) to expand the agent’s capabilities.