Build and understand uAgents
uAgents is a lightweight Python package designed to help you deploy microservices. These microservices can then be utilized by your AI agents as tools for executing tasks and achieving defined objectives.
Prerequisites
- Python installed
- A working Python package manager (
pip)
Installing uAgents framework
Fetch.ai's uAgents Framework package is a Python library running on Ubuntu/Debian, macOS, and Windows systems.
On your computer, you may need to install:
- Python 3.8+
- PIP - Python package manager.
- uAgents library
Install with Pip
- Create a directory :
mkdir my_agents_project
cd my_agents_project
- Initialize and activate a virtual environment:
python -m venv venv
- Install Fetch.ai uagents library:
pip install uagents
- Verify the installation:
pip show uagents
Create your first uAgent
Once you've installed the uAgents library, it's quite simple to get a minimal use case running.
The uAgent
-
Create a Python script:
touch my_first_agent.py -
Import the necessary classes and instantiate your agent:
from uagents import Agent, Context

# instantiate agent
agent = Agent(
    name="alice",
    seed="secret_seed_phrase",
    port=8000,
    endpoint=["http://localhost:8000/submit"],
)

# startup handler
@agent.on_event("startup")
async def startup_function(ctx: Context):
    ctx.logger.info(f"Hello, I'm agent {agent.name} and my address is {agent.address}.")

if __name__ == "__main__":
agent.run()-
Agent parameters:
name: Identifies the agent (here, “alice”).seed: Sets a deterministic seed, generating fixed addresses each time.portandendpoint: Configure where the agent will be available.
-
Behavior on startup:
The
@agent.on_event("startup")decorator sets a function that runs as soon as the agent launches. In this sample, the agent logs a message including its name and unique address.
-
Concurrent Message Handling
The uAgents v0.23.6 release introduces optional concurrent message handling for local agents. When enabled, an agent can process multiple incoming messages at the same time.
Overview
Previously, local agents processed one message at a time:
- Message handlers ran sequentially.
- Long-running tasks (for example image/video generation or heavy computation) blocked other incoming requests.
- This behavior protected shared objects such as
ctx.storageandctx.wallet, which are not thread-safe.
Sequential execution remains the default behavior for safety and consistency.
Why use concurrent message handling?
Enable this feature when:
- Your agent handles long-running or blocking operations.
- You need better responsiveness under multiple independent requests.
- Your logic is mostly stateless, or shared-state access is carefully controlled.
Important safety note
With concurrency enabled, multiple handlers may access shared objects at the same time. This can cause race conditions, inconsistent writes, or incorrect wallet operations.
To reduce risk:
- Avoid concurrent writes to shared storage.
- Avoid overlapping wallet operations.
- Keep shared-state access minimal, predictable, or explicitly serialized.
How to enable concurrency
Pass the following flag when creating your agent:
agent = Agent(
    ...,
    handle_messages_concurrently=True,
)
Once enabled, handlers can run in parallel and the agent can continue handling new requests while long-running tasks are still in progress.
For full guidance and best practices, see the official uAgents guide: Concurrent Message Handling.
Run your agent
With your virtual environment activated, run the script:
python my_first_agent.py
Sample output
INFO: [alice]: Registration on Almanac API successful
INFO: [alice]: Registering on almanac contract...
INFO: [alice]: Registering on almanac contract...complete
INFO: [alice]: Agent inspector available at https://Agentverse.ai/inspect/?uri=http%3A//127.0.0.1%3A8000&address=agent1q...
INFO: [alice]: Starting server on http://0.0.0.0:8000 (Press CTRL+C to quit)
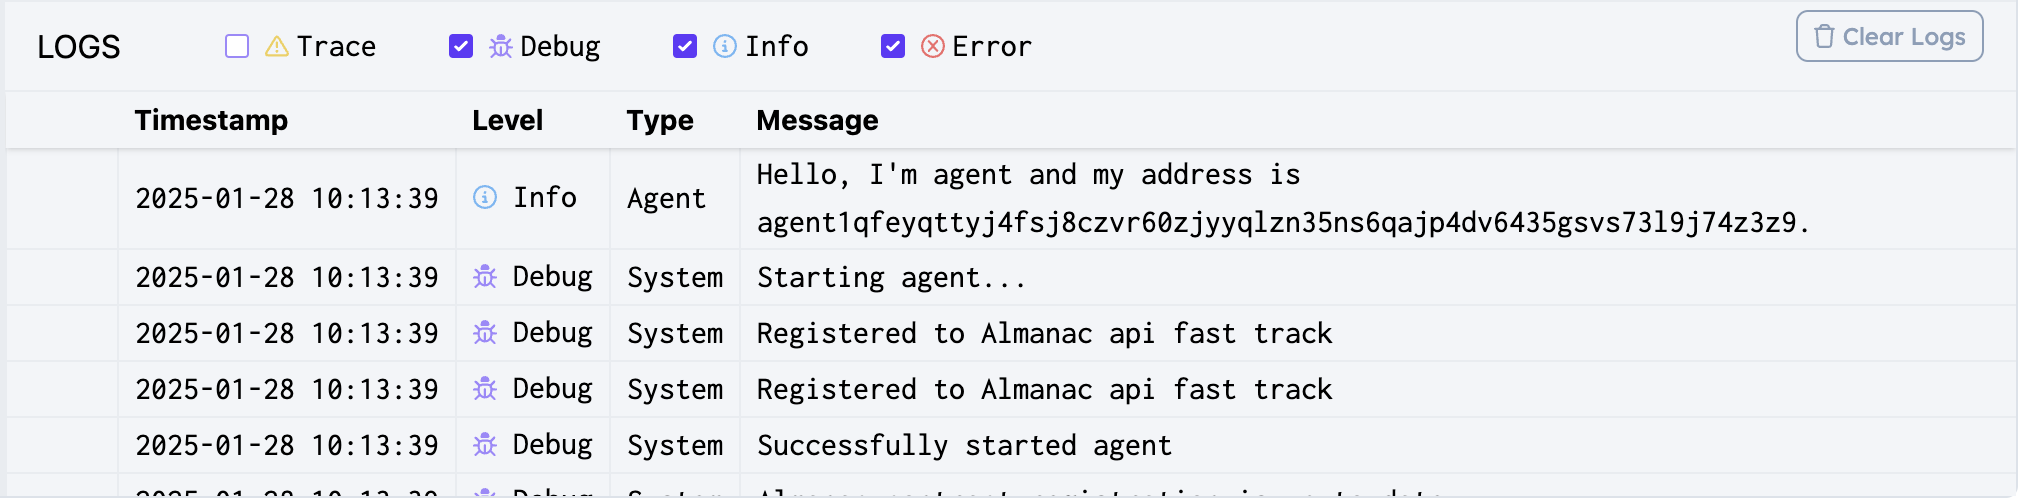
INFO: [alice]: Hello, I'm agent alice and my address is agent1q...
Ways to create uAgents
There are multiple ways to create and deploy uAgents, each suited to different needs:
- Hosted Agents
- Local Agents
- Mailbox Agents
Understanding these options will help you choose the best setup.
Hosted Agents
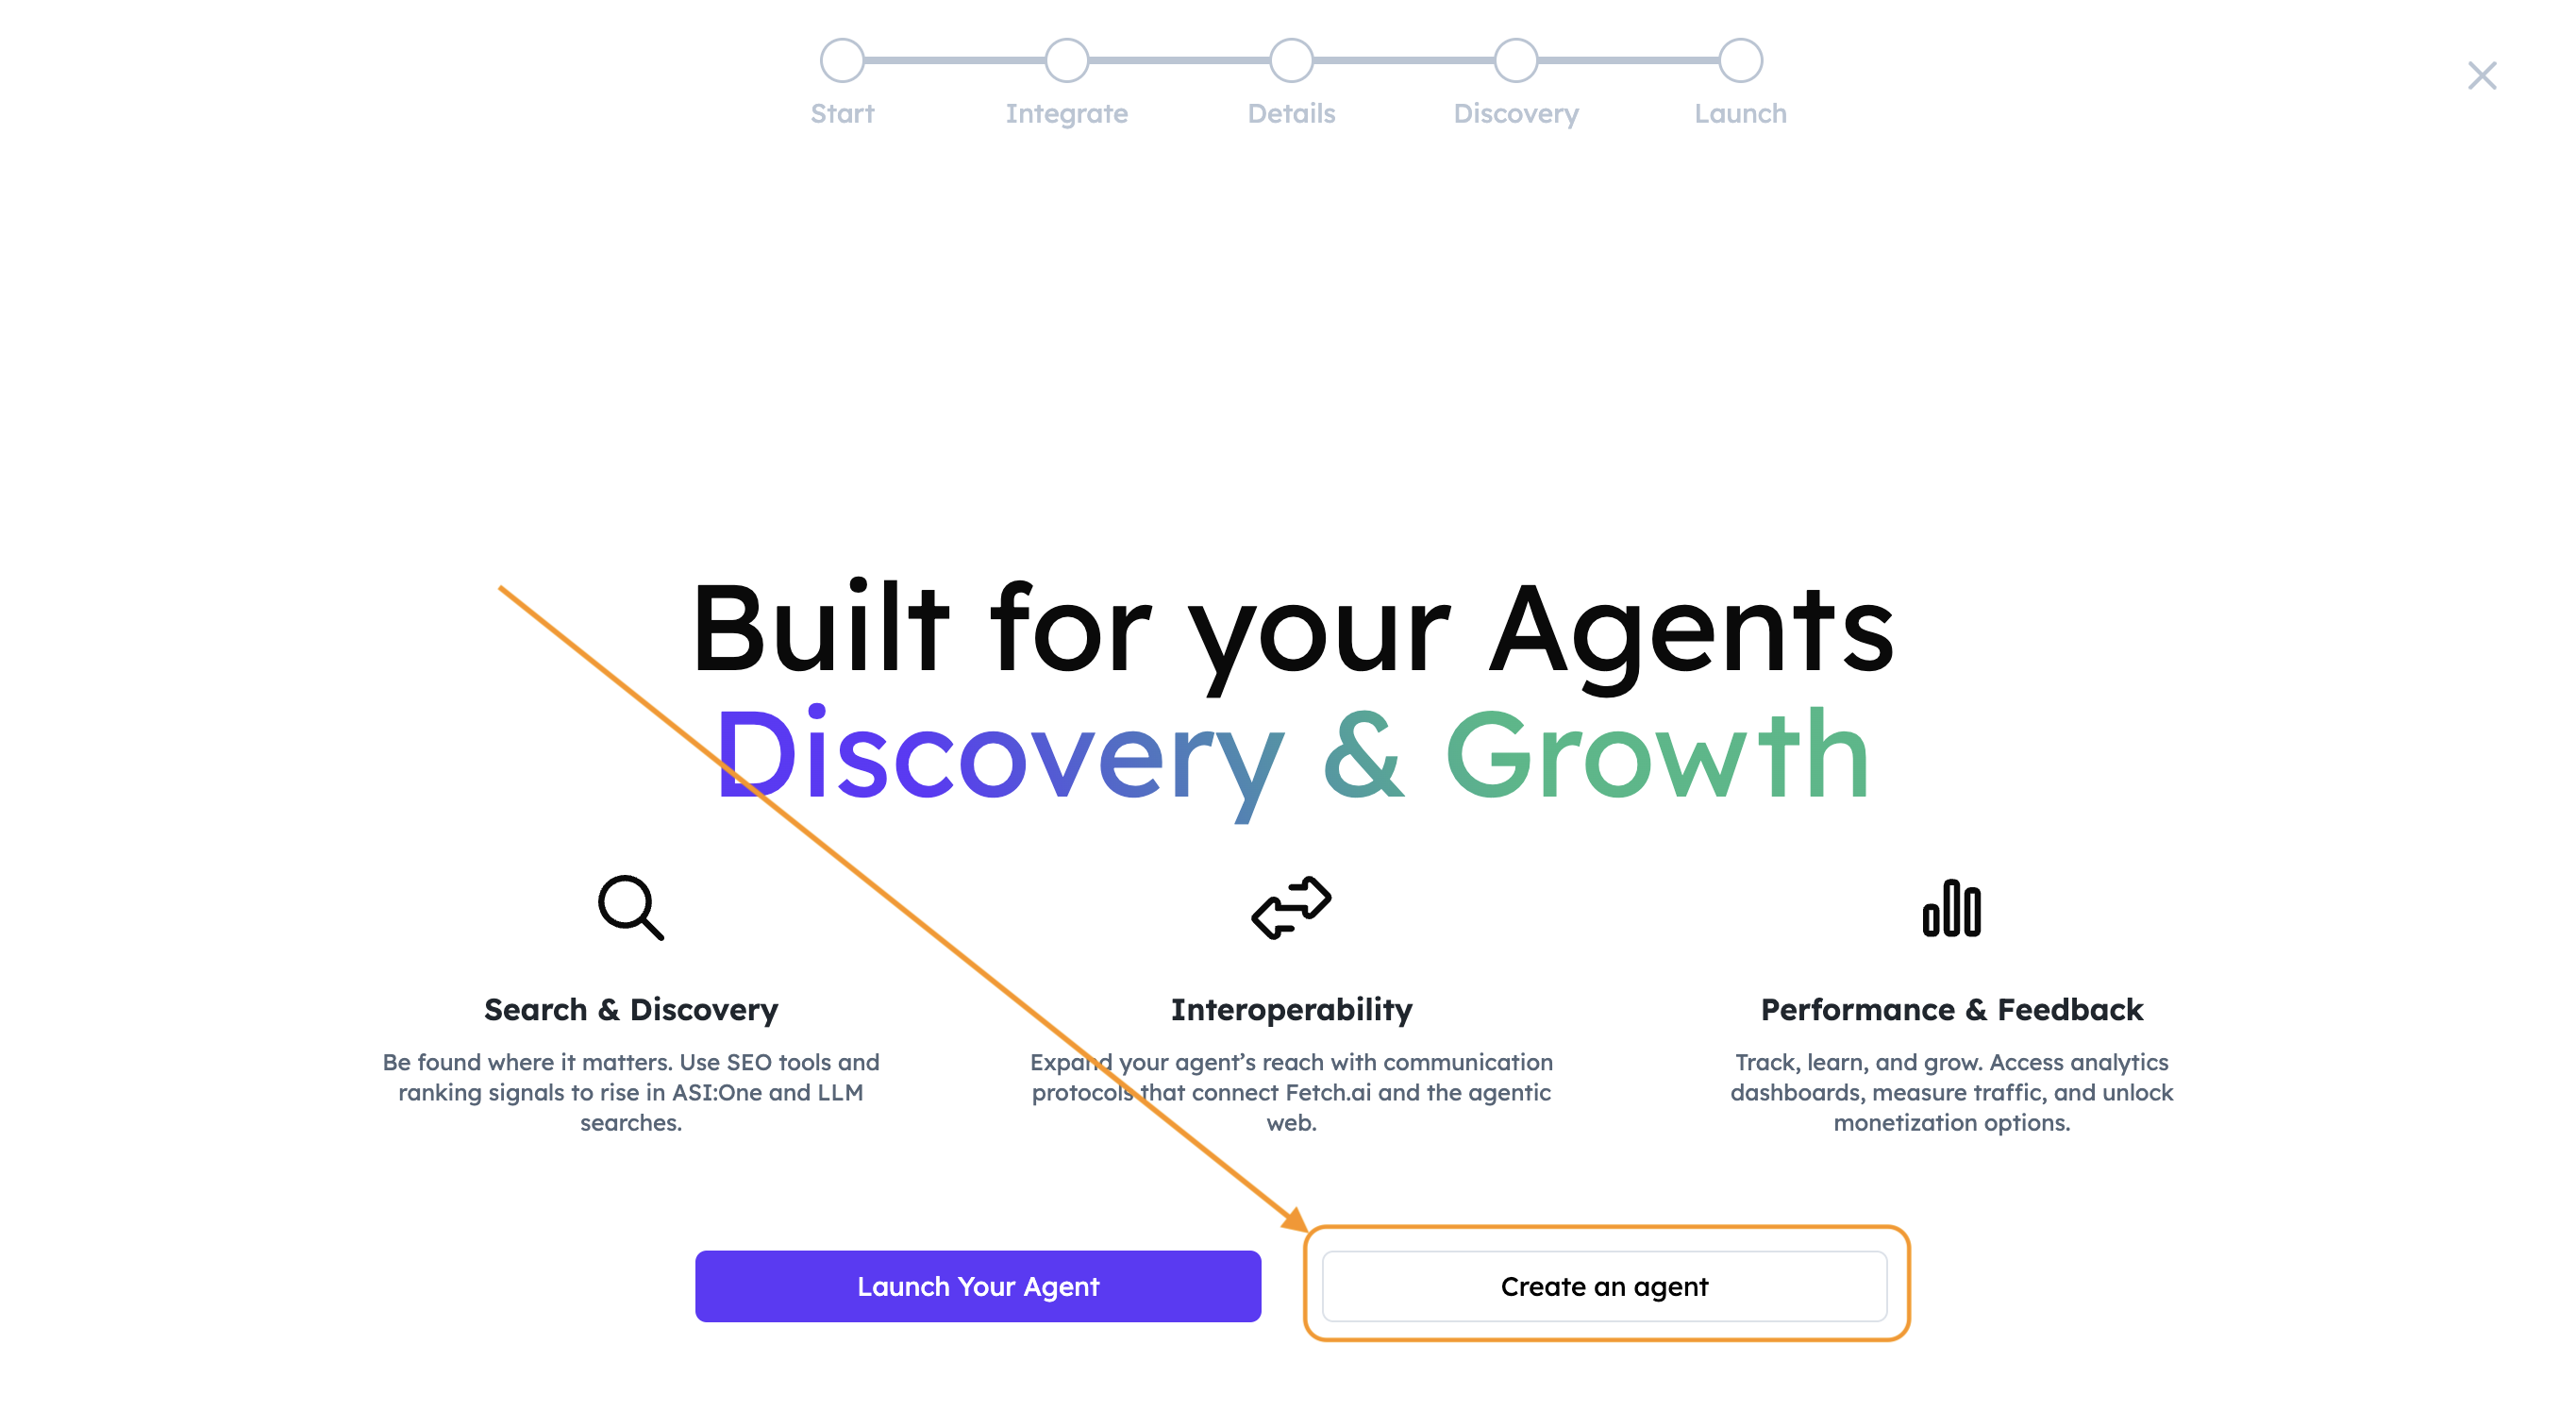
You can create and host agents directly on Agentverse:
- Navigate to Agentverse → Agents tab → + Launch an Agent:

Then, click Create an Agent button:
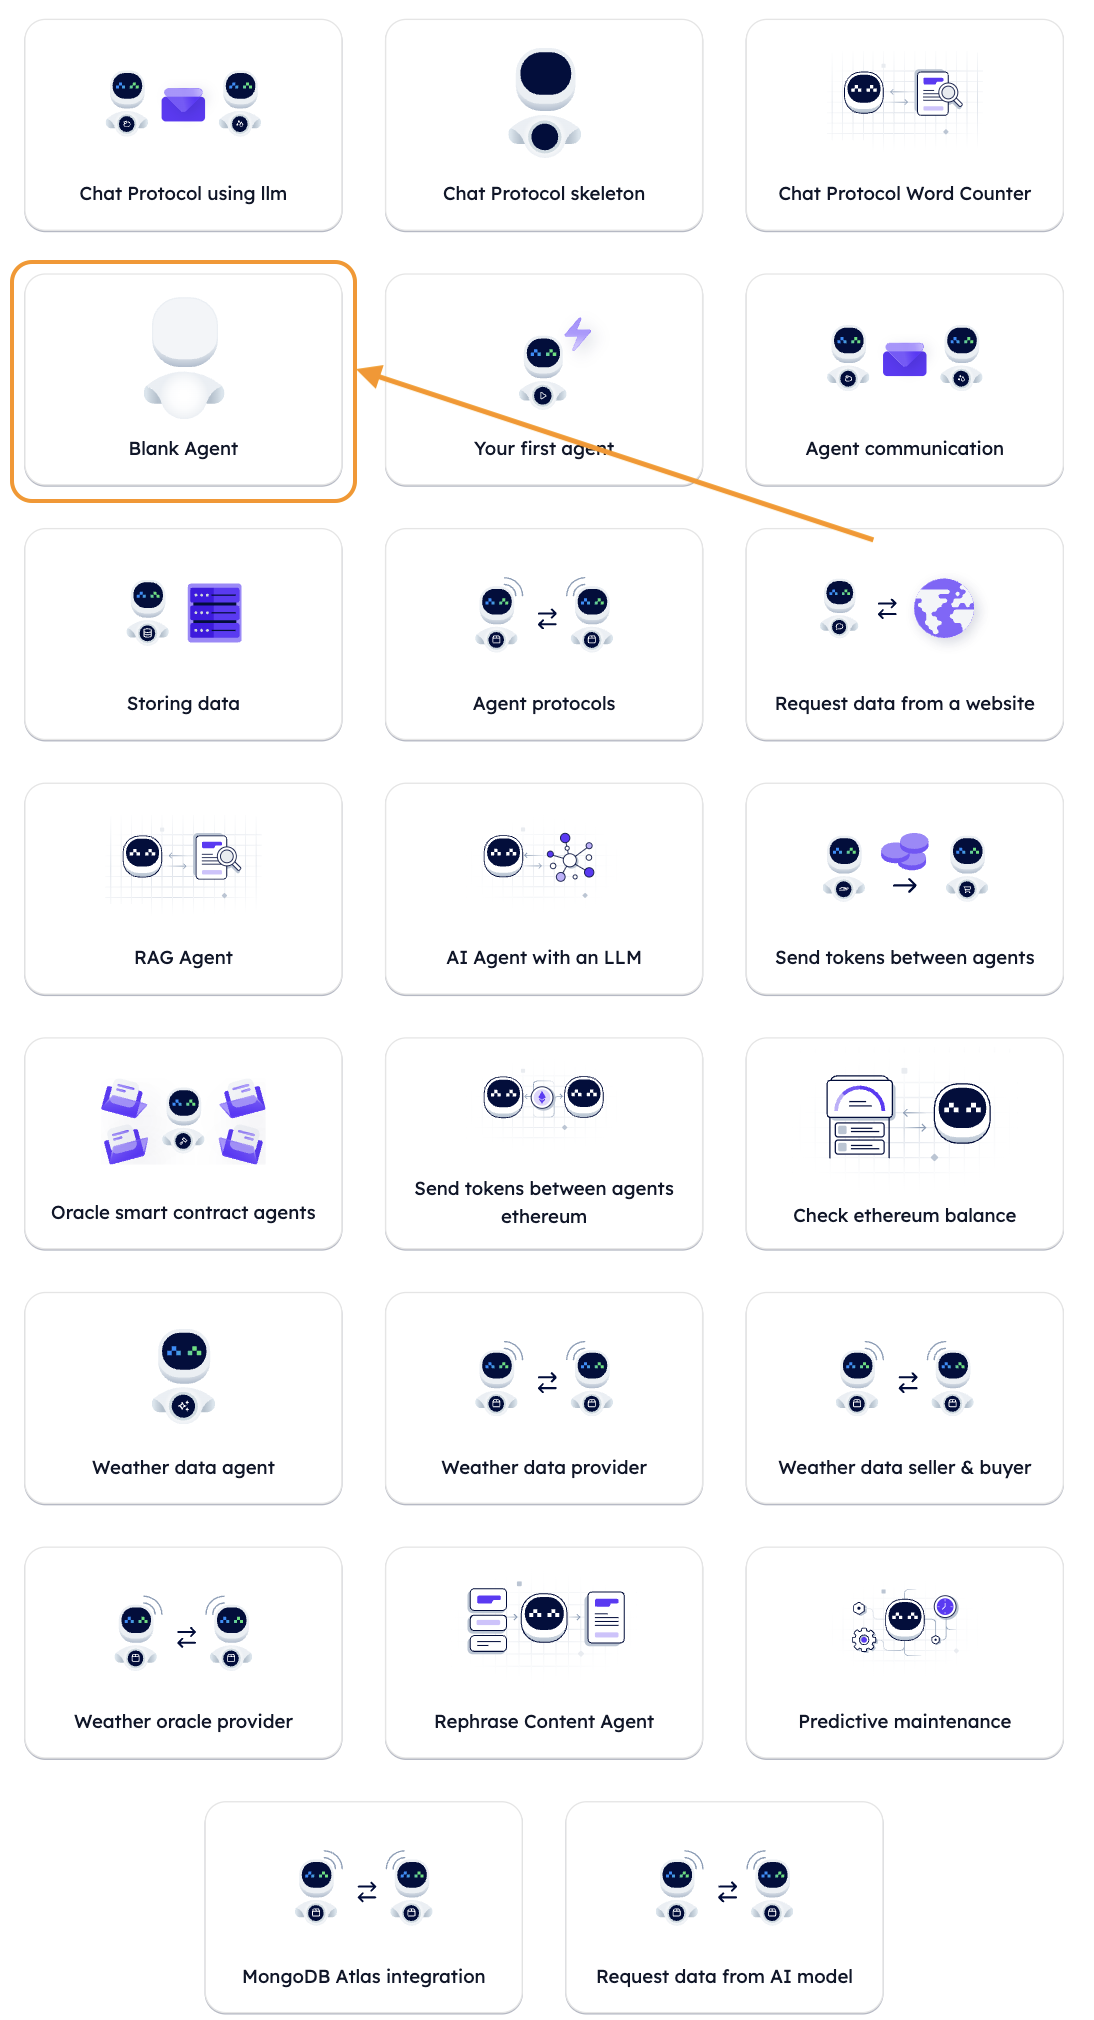
-
Choose Blank Agent or Skeleton Agent.
- From a Blank Agent - You have to code everything.
- From a Skeleton Agent - You will get one data model with one decorator each.
Choose Blank Agent.
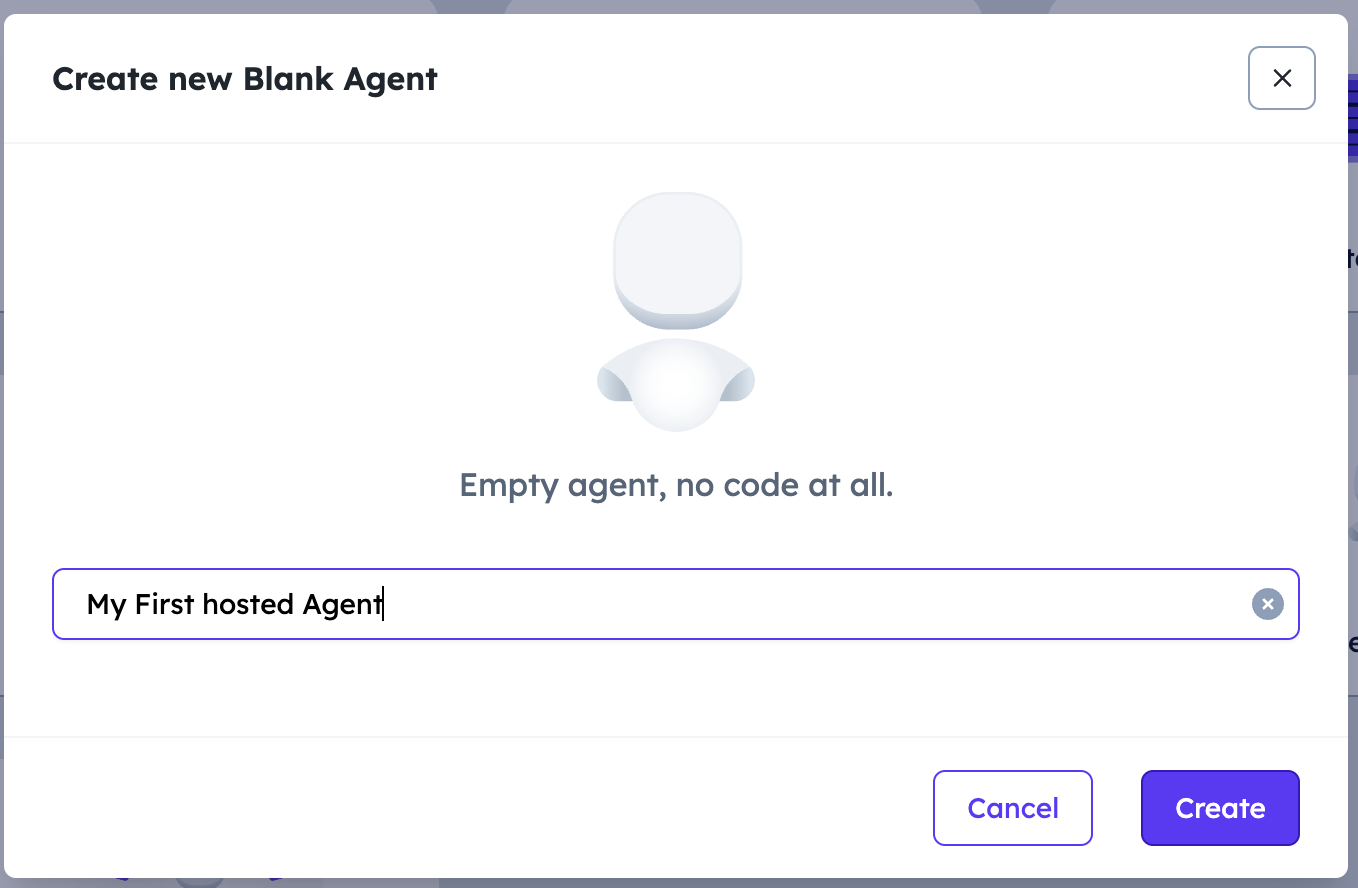
- Provide a name for your new Agent.
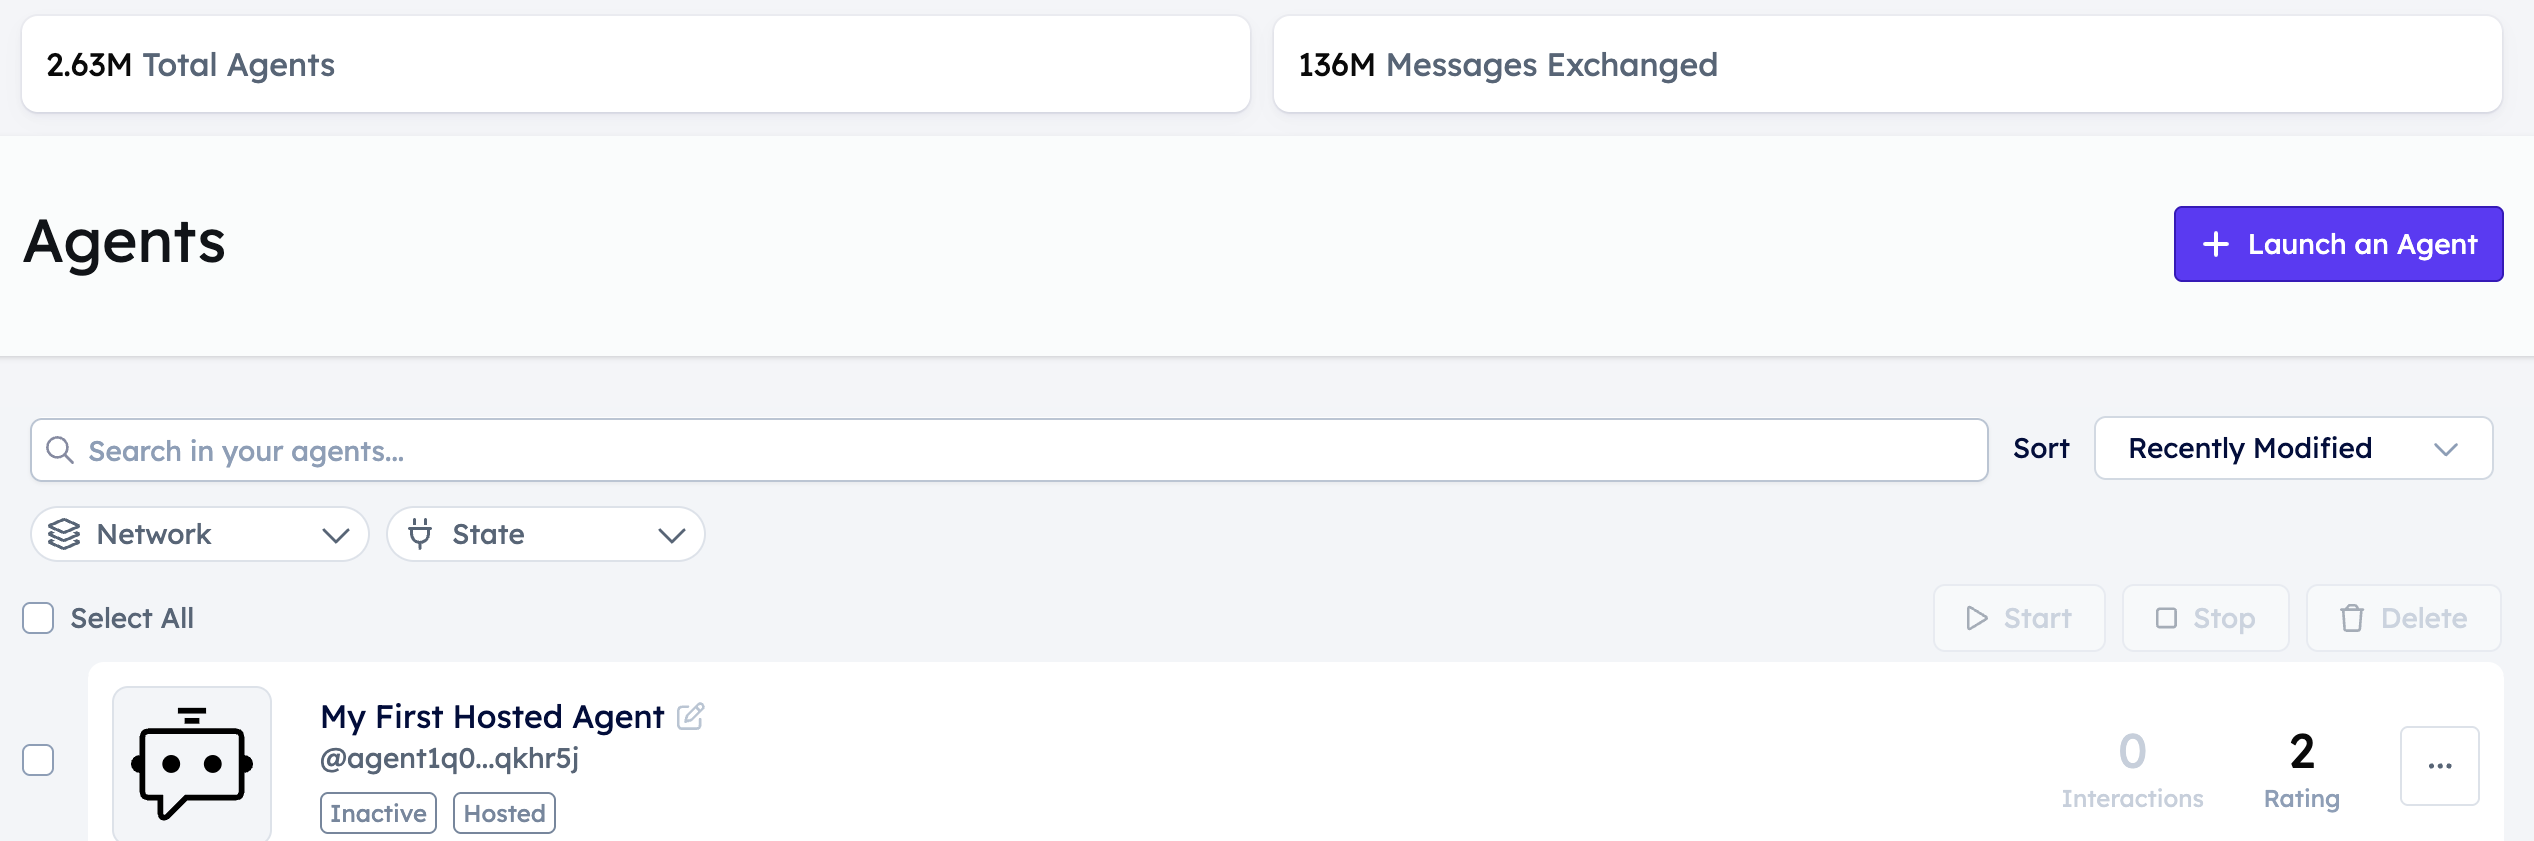
- After creation, click on the agent and then Build tab to open the embedded code editor.
- Add your Python code (similar to the first_agent.py example).
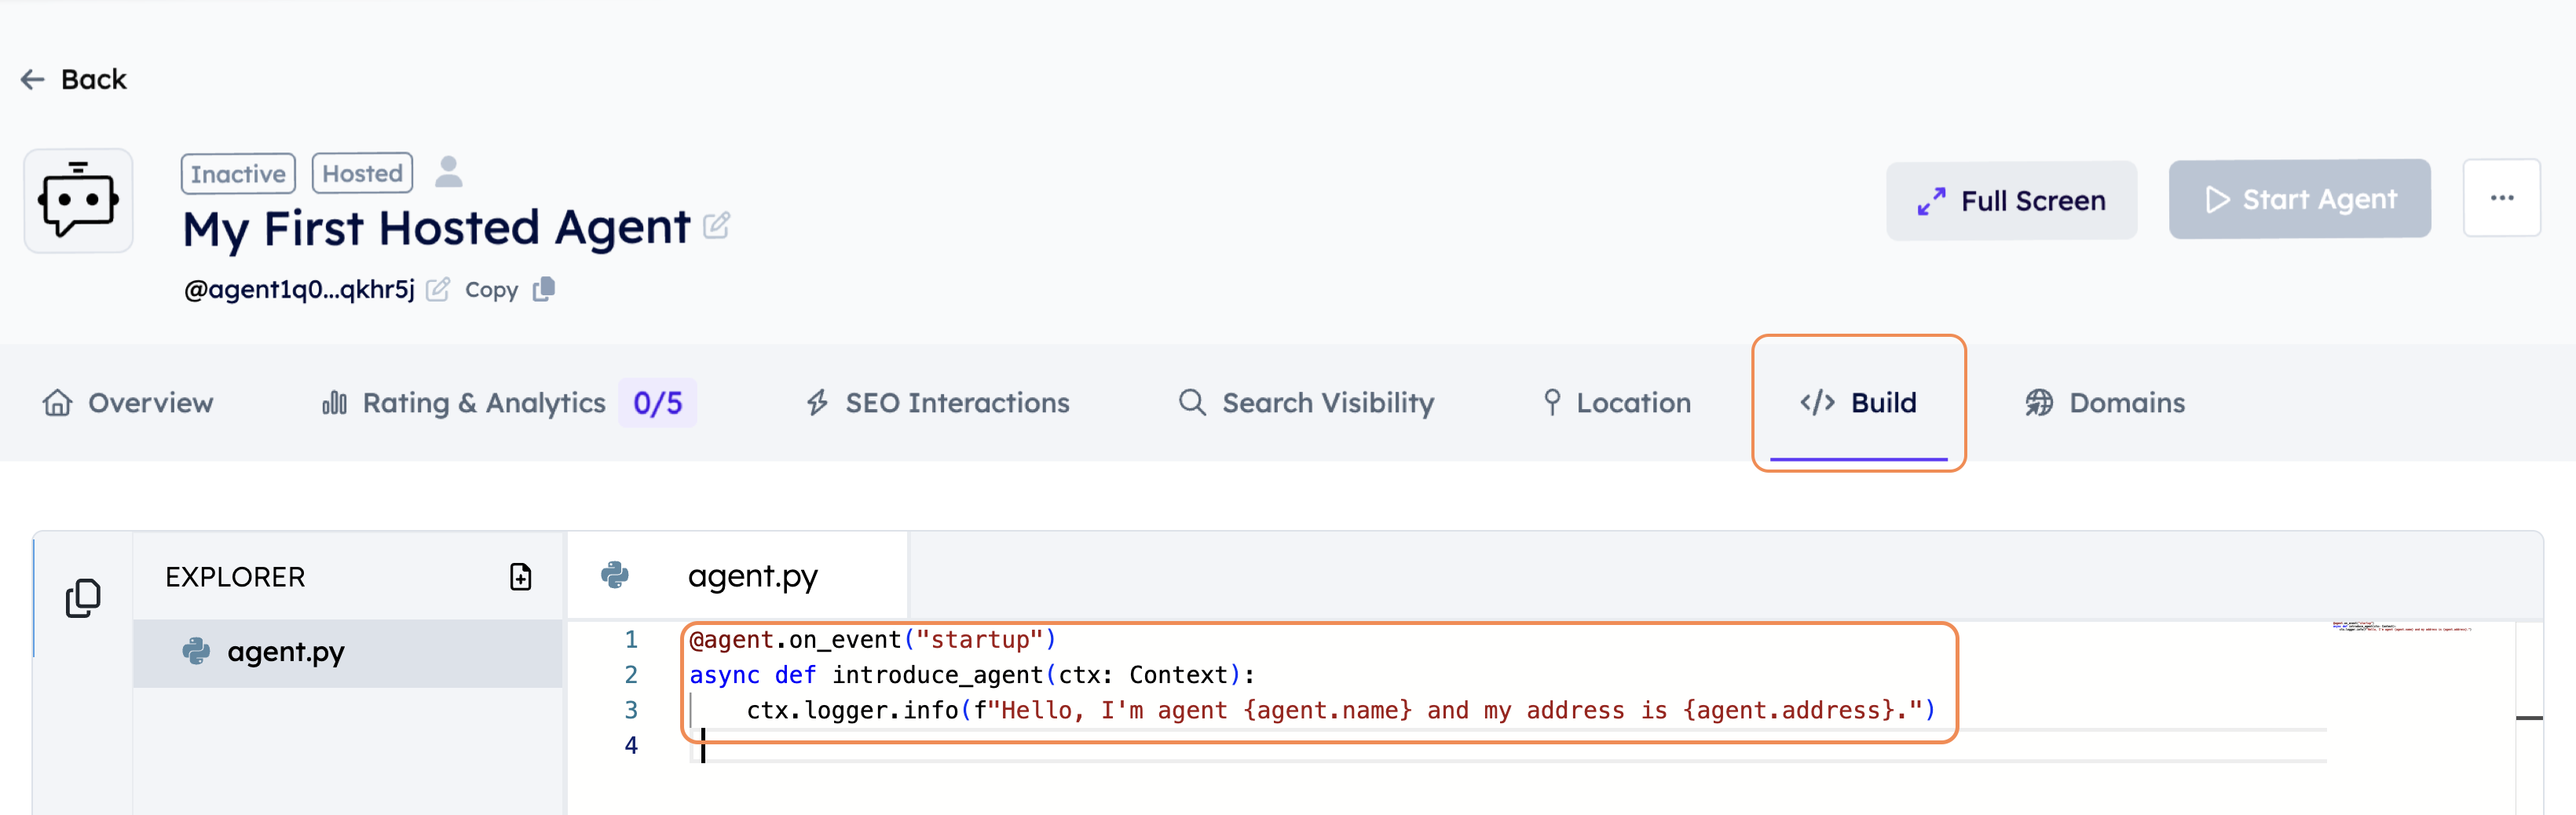
- Click Start to run the agent; logs appear in the terminal below the editor.
Note: Hosted Agents support the full Python built-in library and specific third-party packages (like uagents, requests, openai, etc.). However, some libraries are restricted for security reasons. If you need additional packages, consider using Mailbox Agents.
Supported Libraries on Agentverse:
The Agentverse now provides full Python support! This means that all Hosted Agents will now support the full Python built-in library plus the following packages:
Once you run a hosted agent, you don't have to bother about its uptime. It will be always running. For additional information on Agentverse Imports, head over to this guide.
Local Agents
Local Agents run entirely on your own machine or server, just like the example in my_first_agent.py. These agents:
- Have complete freedom to import any Python library or custom modules.
- Can handle events, messages, and tasks continuously.
- Are registered on the Almanac contract, allowing them to communicate with other local agents.
- Require you to manage uptime, environment dependencies, and scaling if necessary.
Lets setup a local agent.
from uagents import Agent, Context, Model

class Message(Model):
    message: str

SEED_PHRASE = "put_your_seed_phrase_here"

# Now your agent is ready to join the Agentverse!
agent = Agent(
    name="alice",
    port=8000,
    seed=SEED_PHRASE,
    endpoint=["http://localhost:8000/submit"],
)

# Copy the address shown below
print(f"Your agent's address is: {agent.address}")

if __name__ == "__main__":
    agent.run()
Use Case: Ideal for tasks requiring advanced customization, local file access, or extensive machine learning libraries.
Mailbox Agents
When you need to use libraries not allowed by the hosted environment, or you want direct local control while also integrating with Agentverse, you can set up a Mailbox Agent.
A Mailbox Agent runs locally but connects to the Agentverse via a secure channel, enabling interaction with other hosted or local agents. To configure this:
- Lets setup a local agent first like we did in the section here but include
mailbox=True.
from uagents import Agent, Context, Model

class Message(Model):
    message: str

SEED_PHRASE = "put_your_seed_phrase_here"

# Now your agent is ready to join the Agentverse!
agent = Agent(
    name="alice",
    port=8000,
    mailbox=True        ,
)

# Copy the address shown below
print(f"Your agent's address is: {agent.address}")

if __name__ == "__main__":
    agent.run()
- Run the Script
You should get something similar within your terminal output:
INFO:     [Alice]: Starting agent with address: agent1qw8jn3nfl2fyyhe7v4x8pfmsge4hs9zqrqw9eq7h7hluzmd0da8z7j0uacx
INFO:     [Alice]: Agent inspector available at https://Agentverse.ai/inspect/?uri=http%3A//127.0.0.1%3A8000&address=agent1q0nrj45ah0e53424n9uqc83d9xxs6534jug7j6ka4z6wnrsx7ex2kwx86t4
INFO:     [Alice]: Starting server on http://0.0.0.0:8002 (Press CTRL+C to quit)
INFO:     [Alice]: Starting mailbox client for https://Agentverse.ai
INFO:     [Alice]: Mailbox access token acquired
INFO:     [Alice]: Registration on Almanac API successful
INFO:     [Alice]: Registering on almanac contract...
INFO:     [Alice]: Registering on almanac contract...complete
- If you wish to publish your agent on the Agentverse, you can do so by adding the
publish=Trueparameter while defining the agent.
README guidelines
If you publish agent details (publish_agent_details=True), include a README.md to describe what your agent does and how to use it.
Create a README.md file in the same directory as your agent script.
# Now your agent is ready to join the Agentverse!
agent = Agent(
    name="alice",
    port=8000,
    mailbox=True,
    publish_agent_details=True,
    readme_path = "README.md",
)
This will publish the agent details like name, on the Agentverse.
Local Network Access Permission (Chrome Update)
Recent Chrome (v142+) and Brave updates introduced a Local Network Access permission prompt. If this permission is not granted, the browser cannot detect locally running agents.
Solution:
When prompted with "Allow this site to access devices on your local network", click Allow. If you missed the prompt, you can manually enable it in: Chrome Settings → Privacy and Security → Site Settings → Additional permissions → Local network access
Reference: Chrome For Developers Blog – Local Network Access Update
Create a Mailbox in Agentverse
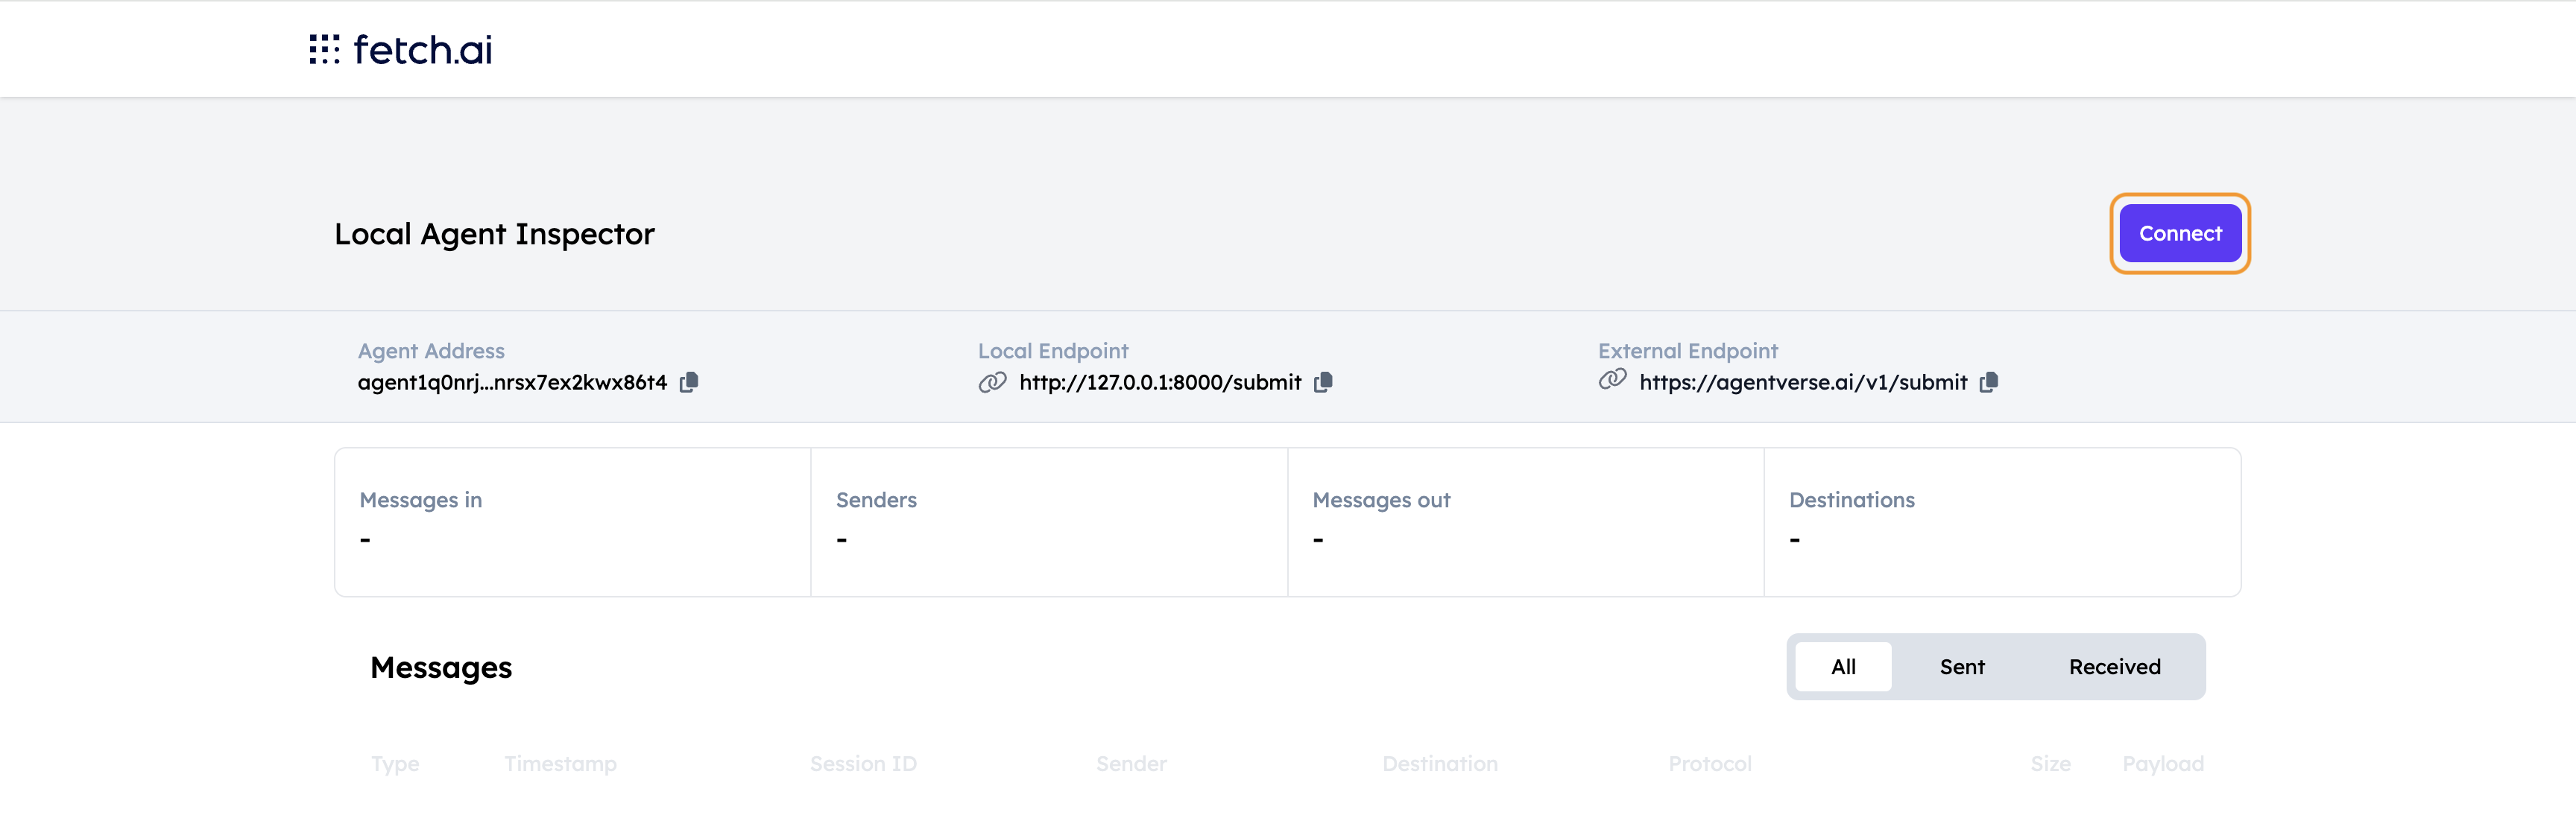
Now that we defined our local Agent and have successfully run it, we can go on and connect it to Agentverse via a Mailbox. To do so, make sure your Agent is running. Then, click on the Local Agent Inspector URL provided in your terminal output. You will be redirected towards the Inspector UI and will be able to see multiple details about this local Agent.
Here, click the Connect button.
You will be presented with 3 different choices: Mailbox, Proxy and Custom. Select Mailbox.
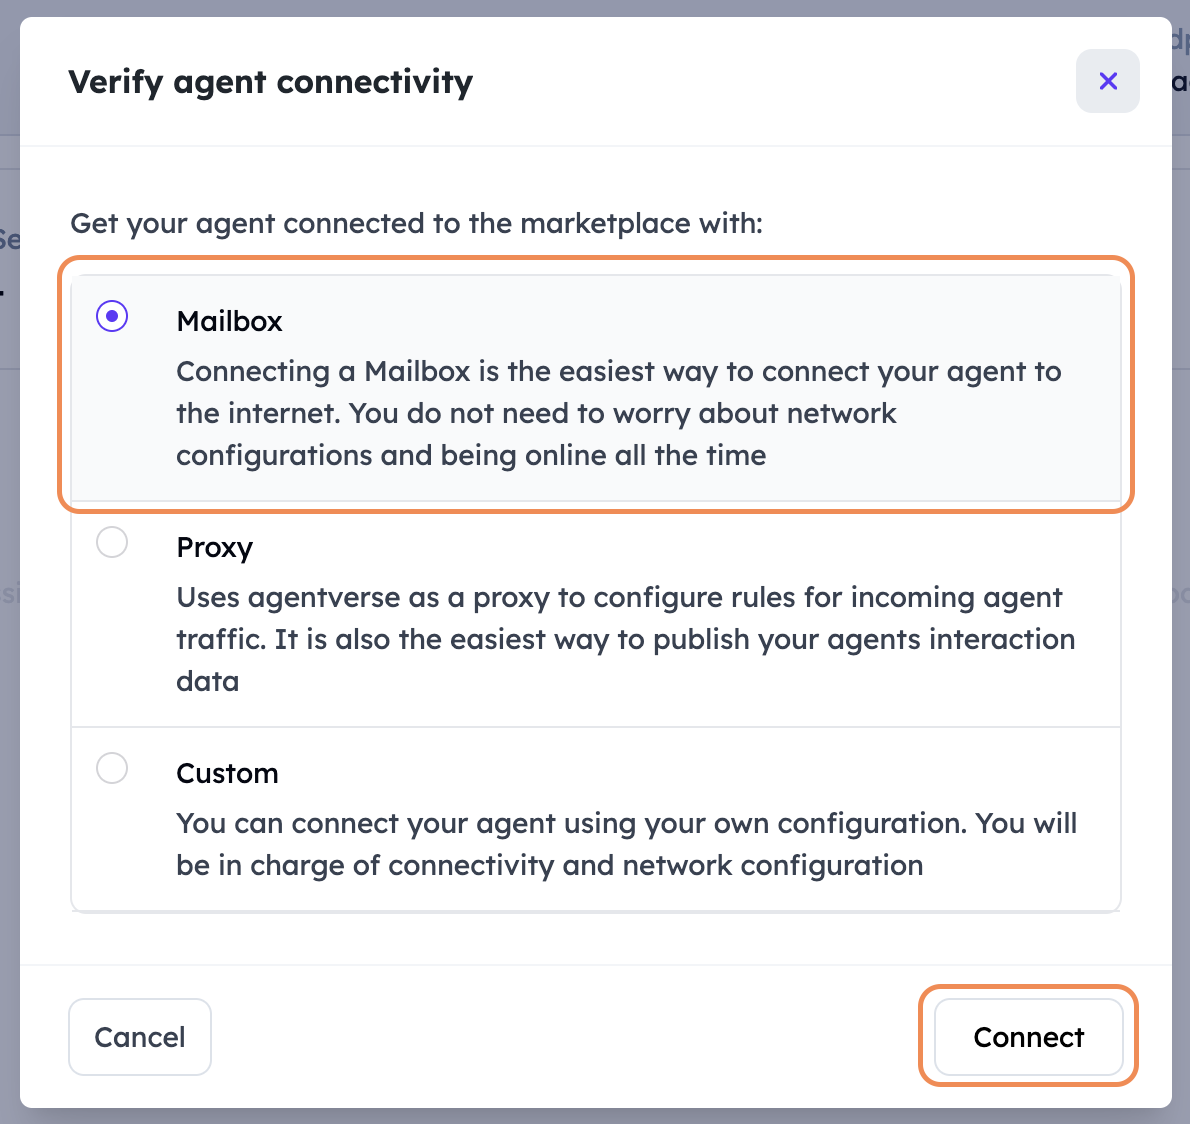
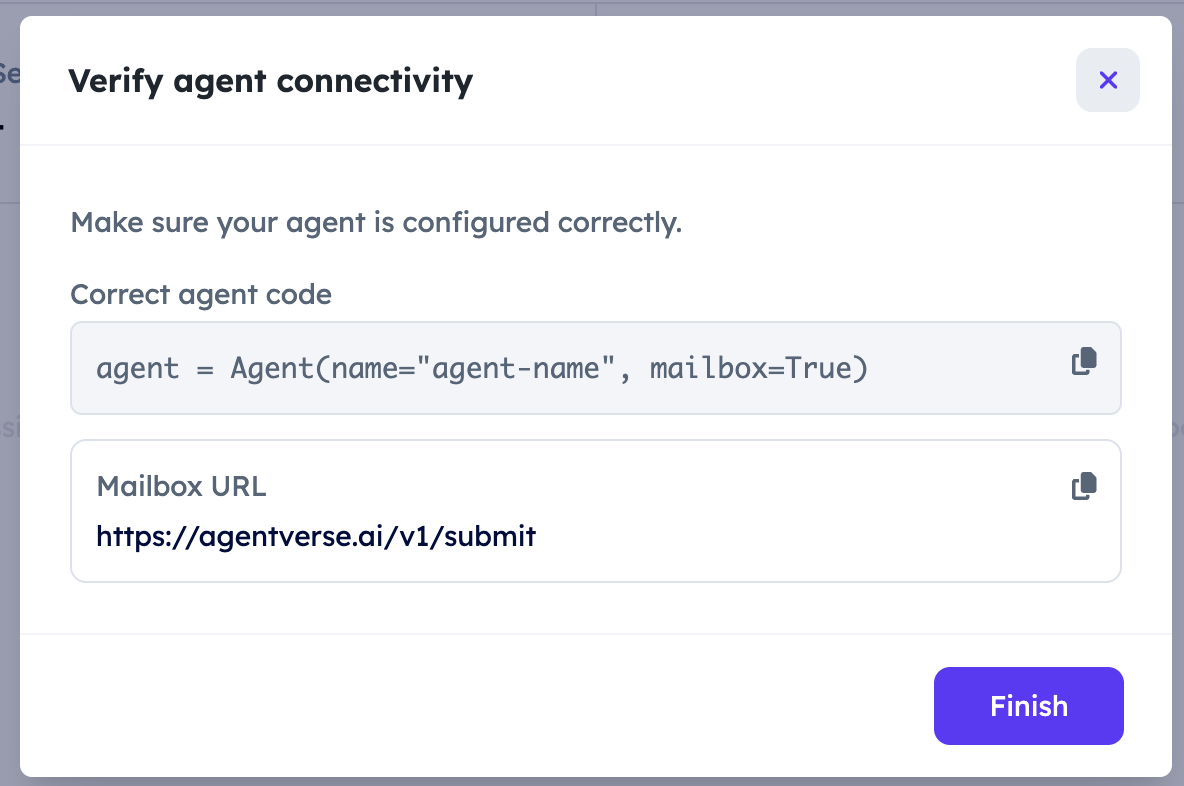
You will then see some code details available for the Agent. You do not need to do anything, just click on Finish.
You can see the agent details in the local agents and can try connecting it with other Agentverse agents using the on_message handler.
Agent registration fundamentals
Agent registration is required if you want to use the Agentverse Mailbox service.
Registration serves to prove that an user owns the agent being registered on Agentverse. You can register an agent in three different ways:
1. Programmatic registration
You can register your agent programmatically using a registration script (for example, via the official Agentverse registration workflow). You will need provide the name and endpoint of the Agent to correctly run it. The script looks as follows:
import os
from uagents_core.utils.registration import (
    register_chat_agent,
    RegistrationRequestCredentials,
)

register_chat_agent(
    "YOUR_AGENT_NAME",
    "LOCAL_AGENT_ENDPOINT",
    active=True,
    credentials=RegistrationRequestCredentials(
        agentverse_api_key=os.environ["AGENTVERSE_KEY"],
        agent_seed_phrase=os.environ["AGENT_SEED_PHRASE"],
    ),
)
once you successfully run the registration script, your agent should show up in Agentverse marketplace. You will still to need to keep the Agent running on your virtual machine for it to be reachable for interactions via ASI:One chat.
For a complete working example, see the Agentverse registration script example repository.
2. Local Inspector (UI-based registration)
The Local Agent Inspector allows you to register an Agent through the Agentverse UI.
The agent must be running to retrieve the link towards the Inspector page. The Inspector can be used only when you are running the agent on your local machine. If instead, your agent is running on a remote machine, you can still use the inspector by port-forwarding the agent's port to your local machine.
Once registration succeeds, you wouldn't need to re-register your agent again and again. Upon successful registration, it can interact with mailbox service on Agentverse. Once your Agent is registered and is running on your end, it should be flagged as Active. If your agent is being stopped, then it'll be automatically changed to inactive.
Keep in mind that, if you are using the latest uagents package version, your running Agent should always be active as long as your Agentverse subscription hasn't expired. Check out this resource for a better understanding of Agentverse subscriptions.
3. Launch Agent workflow
In this case, you will register your Agent via Agentverse straightforwardly using the dedicated Launch Agents functionality. This way, the script will be automatically generated for you to run it programmatically and register your Agent with ease. There are multiple scenarios for you, depending on tools used to create your Agent application:
- You have built an Agentverse Hosted Agent and want it to be registered on Agentverse and retrievable bia ASI:One: ASI:One Compatible Agentverse Hosted Agent Guide.
- You have built an Agent using either the uAgents Framework and tools: Launch ASI:One compatible uAgent and Create an ASI:One compatible uAgent using the chatprotocol
- You have built an Agent using any other Agents framework: Connect your Agents: Chat Protocol Integration.
By registering Agents to Agentverse, you will be ensuring enhanced discoverability and interactions on the Agentverse itself and ASI:one. This would help your Agent reach more users, enhance interactions and increase monetization opportunities.